 датун
датун


How To Wire 220v Plug With 3 Wires: Safe & Easy Steps
To wire a 220V plug with 3 wires, you must connect the two hot wires (typically black and red) to the two outer brass terminals, and connect the neutral wire (white) to the center silver terminal. A 3-wire 220V configuration does not have a dedicated ground wire; the neutral wire handles both the return current and acts as the equipment ground.
Many DIYers successfully figure out how do you wire a 220v plug with 3 wires, but fail on the mechanical execution. Loose terminal screws or frayed copper strands create a hidden micro-arcing hazard that melts the plug within months. Here is exactly how to strip, route, and torque your wires to professional standards without hiring an electrician.
The 1996 NEC Code Reality: When Is a 3-Wire Plug Legal?
You can only install a 3-wire 220V plug if you are replacing the cord on an older appliance connecting to an existing 3-prong receptacle. The National Electrical Code (NEC) banned new installations of 3-wire 220V circuits (like NEMA 10-30 or 10-50) in 1996. Modern homes require 4-wire configurations.
Never install a new 3-prong outlet in a wall to match an old appliance. You must always update the appliance cord to match the wall receptacle, never the other way around. If your wall has a 3-prong outlet, replacing your dryer or range cord with a 3-wire plug is entirely safe and legal under the NEC grandfather clause.
3-Wire vs. 4-Wire 220V Plugs
| Характеристика | 3-Wire 220V Plug | 4-Wire 220V Plug |
| NEMA Types | NEMA 10-30 (Dryer) NEMA 10-50 (Range) | NEMA 14-30 (Dryer) NEMA 14-50 (Range) |
| Wire Colors | Черный (Hot 1) Red (Hot 2)Белый (Combined Neutral/Ground) | Черный (Hot 1) Red (Hot 2)Белый (Neutral)Green / Bare Copper (Ground) |
| NEC Compliance Dates | Banned for new installations in 1996 (Legal for existing setups under the grandfather clause) | Required for all new installations since 1996 |
| Usage / Installation Rules | Appliance Cords: Legal to install on a new appliance only to match an existing older wall outlet.Wall Outlets: Never install a new 3-prong wall outlet. | Appliance Cords: Standard on modern appliances.Wall Outlets: Required configuration for all modern homes and new wall outlet installations. |
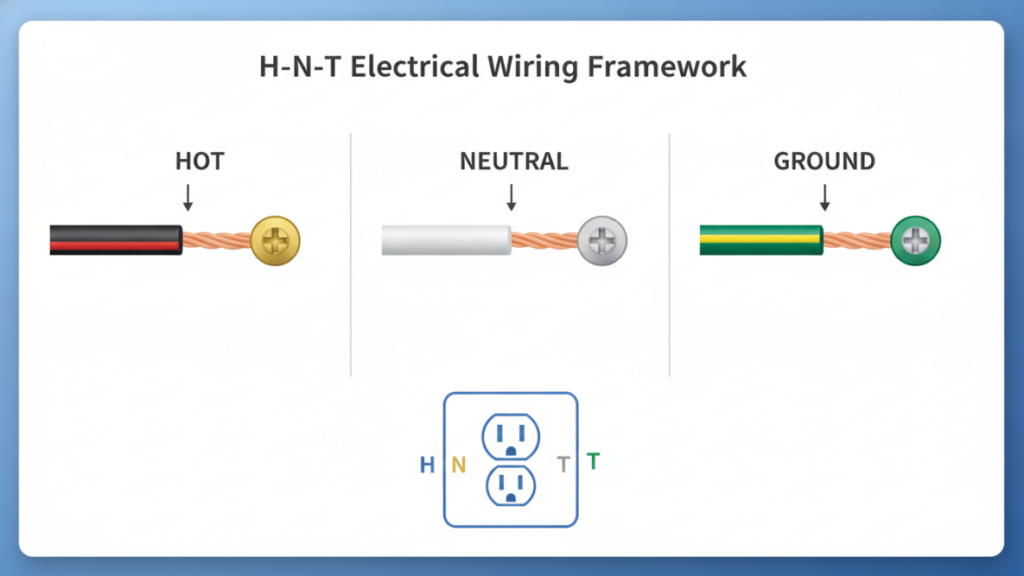
The H-N-T Framework for Wiring a 220V Plug
Memorize the H-N-T Framework (Hot – Neutral – Torque) to eliminate any guesswork when deciding how to wire 220v plug with 3 wires safely.
Hot to Brass (H): The two outer terminals on the plug are brass-colored. These receive the two hot wires (Black and Red). It does not matter which hot wire goes to which brass terminal because 220V alternating current phases flip back and forth between them.
Neutral to Silver (N): The center terminal is silver-colored. This receives the white neutral wire. In a 3-wire system, this neutral carries the 110V return path for the appliance’s timers or lights, and ties directly to the appliance’s metal frame as a fallback ground.
Torque to Spec (T): Loose connections start house fires. Every terminal screw must be tightened to the manufacturer’s specified inch-pounds, ensuring the copper is physically compressed against the metal contact.
Required Tools for a Safe Installation
Using the wrong tools damages the heavy-gauge wires required for 220V appliances. You need specific equipment to handle 10 AWG or 8 AWG copper wires safely.
- Utility Knife: Used solely for carefully slicing the outer cord jacket.
- Heavy-Duty Wire Strippers: Must be rated for 10 AWG or 8 AWG wire. Standard electronics strippers will sever the copper strands.
- Phillips and Flathead Screwdrivers: For tightening terminal and strain relief clamps.
- Multimeter: Necessary for verifying zero voltage before plugging the appliance in.
Wiring Your 3-Wire 220V Plug
Remove the Outer Cord Jacket
Slice the outer gray or black insulation jacket back by exactly 2 inches. Bend the cable sharply where you scored it to pop the jacket open without letting the blade touch the internal wires. Slicing into the insulation of the black, red, or white wires compromises the dielectric barrier and requires you to cut the cord and start over.
Strip the Inner Wires
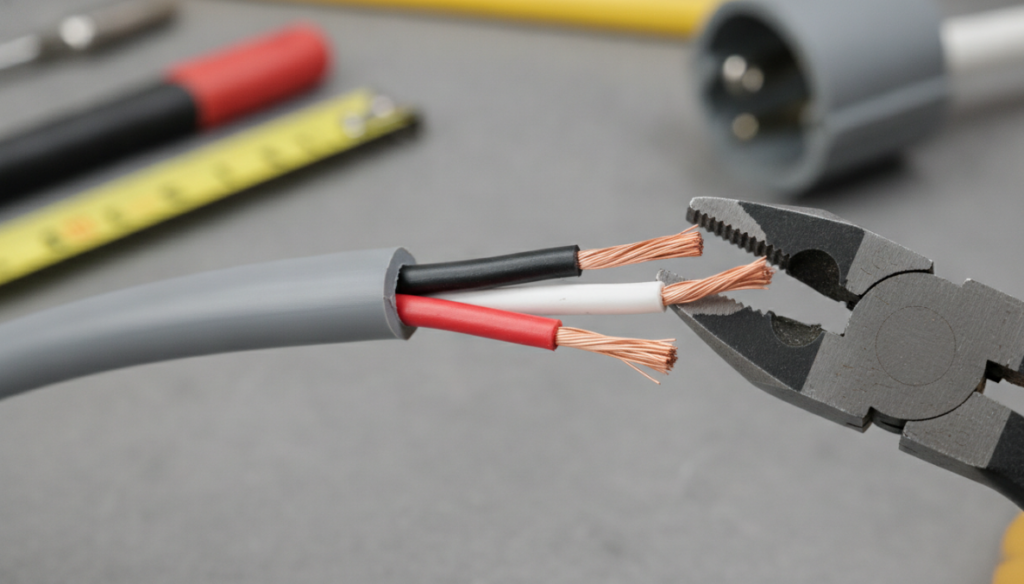
Strip exactly 3/4 inch of insulation from the tips of the black, red, and white wires. Leaving too much exposed copper creates a short-circuit risk inside the plug housing. Stripping too little means the terminal screw might clamp down on the plastic insulation, completely blocking the electrical flow.
Insert Wires into the Terminals
Push the bare copper ends into their respective terminal slots based on the H-N-T framework. Insert the white wire into the middle silver terminal first. Insert the black and red wires into the left and right brass terminals. Verify no stray copper strands are poking out of the terminal block.
Apply Maximum Torque
Tighten the screws down as hard as you can with a manual screwdriver. If you own a torque screwdriver, set it to 20-25 inch-pounds. Field inspections by master electricians reveal that over 40% of burnt 220V plugs are caused by terminal screws loosening over time due to the thermal expansion and contraction of the appliance heating up and cooling down.
Secure the Strain Relief Bracket
Clamp the metal strain relief bracket down tightly over the outer cord jacket. The bracket must clamp onto the outer jacket, never onto the individual colored wires. If someone trips over the cord or pulls the appliance away from the wall, the strain relief absorbs the physical shock, preventing the wires from violently ripping out of the internal terminals.
Expert Pitfall: The “Strand Fraying” Hazard
Cutting off even three or four tiny copper strands while stripping the wire drastically reduces the cord’s amperage capacity. A 30-amp dryer cord uses 10 AWG wire because it needs that exact mass of copper to handle the heat.
When you accidentally sever strands with a cheap wire stripper, you create a “bottleneck” for the electrical current. The electricity forces its way through the remaining strands, generating intense localized heat. Within six months of heavy appliance use, the plastic plug housing will warp, melt, and potentially ignite. Always use a dedicated 10 AWG stripping hole.
ЧАСТО ЗАДАВАЕМЫЕ ВОПРОСЫ
Does it matter which hot wire goes to which brass terminal on a 220V plug?
No, it does not matter. The black and red wires are both hot legs carrying 110V each on opposite phases. You can connect the black wire to the left brass terminal and red to the right, or vice versa. The appliance will function exactly the same.
Where does the ground wire go on a 3-wire 220V plug?
There is no dedicated ground wire on a standard 3-wire 220V plug. The center white wire acts as a shared neutral and ground. Inside the appliance, a metal bonding strap connects the neutral terminal block directly to the metal chassis of the appliance to provide equipment grounding.
Can I plug a 3-wire cord into a 4-wire wall outlet?
You cannot plug a 3-wire cord into a 4-wire outlet. The physical prong configurations are entirely different (NEMA 10-30 vs NEMA 14-30). You must purchase a new 4-wire pigtail cord for your appliance and wire it to match your modern 4-wire wall receptacle.
What wire gauge is required for a 30-amp 220V plug?
A 30-amp circuit requires 10 AWG copper wire. Using a thinner wire, such as 12 AWG or 14 AWG, is an extreme fire hazard because the wire will overheat before the circuit breaker trips. If you are wiring a 50-amp range plug, you must use thicker 8 AWG or 6 AWG wire.
Why does my new 3-wire plug get warm to the touch during use?
Slight warmth is normal under heavy loads, but if the plug becomes too hot to comfortably hold your hand against, you have a high-resistance connection. This is caused by loose terminal screws inside the plug. Turn off the breaker, open the plug, and re-torque all three terminal screws immediately.
How do I test a 220V 3-wire outlet with a multimeter before plugging in?
Set your multimeter to read AC Voltage. Place one probe in the left angled slot and the other in the right angled slot; you should read 220V-240V. Place one probe in the center L-shaped slot and the other in either angled slot; you should read 110V-120V.